Facebook Privacy Settings
 All of us use Facebook, okie maybe not all but with Facebook being one of the top sites having so much traffic and even ends up in an ugly fight with Google for turf, you know how much people love Facebook. But the facebook privacy settings is one hell of a headache. A lot of users know the fact that a lot of information are being displayed and showed to the world out there if you do not know how to set the settings correctly. In this article, I will teach you how to set your Facebook privacy settings so that only specific people will get to see what you wish to let them see and not able to view everything.
If you think that Facebook is not secure and there is no way you can set the limitations to a custom tailored setting, you are wrong. You just need to know how to do it. When done correctly, you can have your entire bunch of contacts set to a specific level of security where by only “You” decide what they can see in your facebook.
Create friends lists
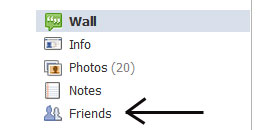
In Facebook, there is something called “create lists”, simply click on the “Profile” link at the top right hand corner of your facebook page followed by “Friends” link at the left side of the page.
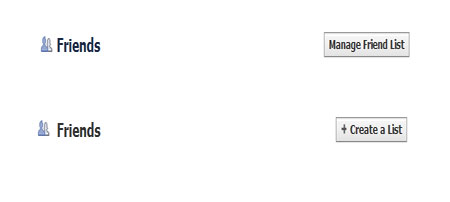
Click on “Edit Friends”at the top right of the page. Now click on “Create a List” button somewhere in the middle top section of the page. If you already have some existing lists, you will see a “Manage Friend List”. A small square window will pop up in front of the facebook page and click on the rectangular box at the top left right below the words that reads “Create New List” Key in a name that describes this bunch of friends you intend to classify them into. For example, Secondary school friends, working colleagues etc.
If you already know who you wish to classify them right in you can do so by selecting them right now before you hit the “create list” button at the lower right corner. Else, you can also create the list first, and do the sorting out over the next few days, or months or even years as and when you like it.
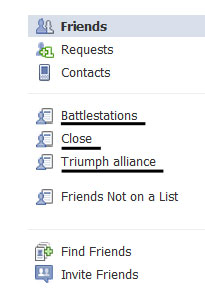
Your created “friends lists” will show up in the left side of the page. Clicking on those lists that you have created will list those friends that you have classified into that category. It is a good idea to create “Lists” for those friends that you have to add because you played a particular game that requires you to add some stranger as friends. Because in the event a day should come when you do not wish to play that game anymore, you can simply load that list, and remove every single person from that list.
To sort out the remaining friends who are not classified into any lists is very simple. Simply navigate in the same manner until you get to the page to “Edit Friends”, hover your mouse over the listed friends and you will see a “Edit Lists” button appear somewhere at the right side. Click on that and you will see the various lists you can add that friend to. You can even add to multiple lists to one profile as you deem fit.
Or simply click on the “Friends Not on a list” at the left side, just below your friends lists that you have created and you can sort them all out one by one. Those that are sorted into lists will disappear. You don’t need to clean them all in one day. Just do some whenever you have the time.
Customize your Facebook privacy settings.
Now this is the part that is most important. In this area, you can dictate exactly who and what gets to see on your profile. You can set the specifics so extreme that it can go down to setting for each and every single one of your added friends and contacts. But of course, we don’t want to be so troublesome. Remember I told you that you can set a lot of “Friends Lists” and even classify the friends to go under multiple “Lists” if you feel appropriate.
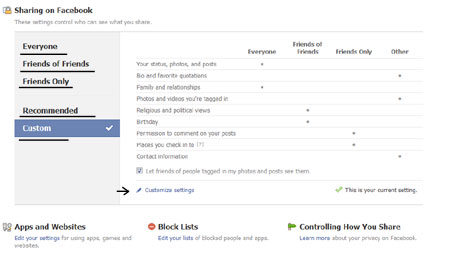
Click on “Account” link at the top right hand corner and select “Privacy Preferences” There are already a few “types” of privacy presets that you can choose.
Everyone – This means that every Tom, Dick or Harry in cyberspace can see your posts and information. Even photos that your friends have you “tagged”. If it is something very personal, Oops, you are on candid camera. Even if you have not added that person as friend and he finds your profile, he can see everything.
Friends of Friends – This is equivalent to spreading stories by word of mouth. Your friend may like your post or photo. His circle of friends will be able to see your posts and photos and you may not know his circle of friends at all.
Friends only – This is one of the safe margins to set for most people. This means only those you have added as your friend can see your posts and photos. Any body you did not add as friends will not be able to see any thing from your profile.
However, this does not mean that selecting the “Friends only” setting is all you need to do. I suggest you use the “Custom” setting. Clicking on the “Custom” option will allow you to set the settings by clicking on the small tiny “Customize Settings” link.
Make sure you do it, or else if you do not do so, it is as good as setting as everybody can see your profile even though it is a “Custom Setting”.
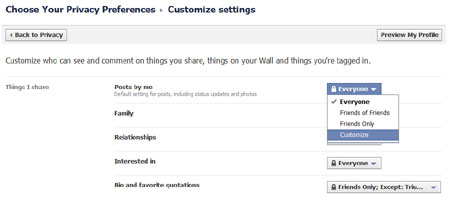
Now, entering the “Customize Settings” menu.
You will see a whole bunch of details which is practically every single entry or description on your facebook page. Click on the drop down button which by default now states “Everyone”.
Click on “Customize”
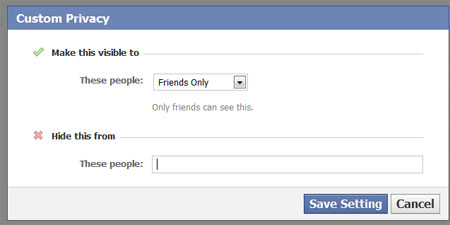
Notice that you can set the “Hide from these people”? You can start typing individual names that you wish to hide from or simply the name of the list that you have created before hand and the whole group of friends that belong to that list will all be blocked from viewing that particular information.
Or alternatively, you can also click on the drop down menu of the “Make this visible to” and choose “specific people”. Similarly, you can opt to key in the “Friends Lists” that you have created before hand.
Any new friends that you have added in future will not be able to view anything special from your profile unless you add them to the special lists that you have created and the special permissions for that list will apply automatically to the friend you have just added.
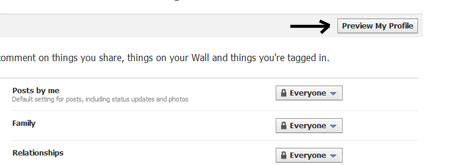
If you do not feel safe, you can always click on the “Preview Profile” button at the top right of the privacy page to see how your profile looks to strangers.
I hope this article on how to set Facebook Privacy Settings is easy to follow and understand and it will be very beneficial to users who are so afraid to use facebook in hearing so much negative reports on facebook and its flaw in having too much personal information revealing to public.
1 Comment Already
Leave a Reply
You must be logged in to post a comment.
Great post. Millions of persons use Facebook and almost nobody cares about security. Not all security options are clear and intuitive, specially if you’re using non-english versions of Facebook (some translations are poor). G+ has done a great job with privacy settings, Facebook will have to improve.