File Sharing Windows With Samba Ubuntu 10.04
 Hello and welcome to another awesome guide by DIY Tech Tips & Guides on how to Network Windows and Ubuntu 10.04. While setting a shared folder in Ubuntu may sound intimidating for a Windows user since working with Ubuntu sounds like there is a need to know and execute a lot of complex instructions and commands. No worries, as usual, DIY Tech Tips & Guides will only show you the easiest way out or else we won’t bother even teaching it since if you are a pro, you won’t need us. We cater to the computer novices who need the simplest way out at difficult problems.
First of all, you will need to decide which folder you intend to share. I suggest you crete a new folder and name it “share” or some other preferred name as you wish. You can also simply set the entire mp3 or video folder to be shared so that you do not need to duplicate the entire music collection just because someone wants a few songs of your whole hard disk.
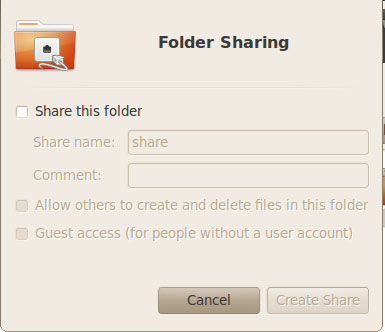
Right click on the folder you wish to share and you will notice that there is the “Sharing Options” which is the 3rd last option in the menu. Click on that and it will bring up a simple interface for you to change the sharing settings. Put a tick on “Share this folder”, you can also fill up the comments in there so that the user on the other side can read. For example “Do not mess up my arrangement” etc.
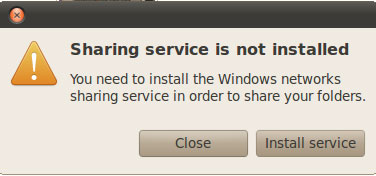
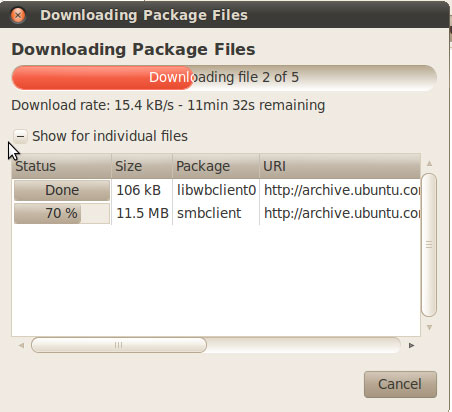
Click on “Create Share” and Ubuntu will highlight to you that there is a need to install Sharing Options using the Synaptic Package Manager. Say yes and allow it to download all necessary packages. If you receive a warning telling you that they are not able to authenticate if the packages are from appropriate sources, click on menu on top Preferences => Synaptic Package Manager. Hit the “Reload” button and allow it to update all your repositories.
Try to set the sharing settings again, now the installation should go through without any scary prompts. It is a good practice to update the repositories, so that you will get the latest version of the software.
Once the whole download and install is complete, it will ask for a restart of the service. Say yes, no reboots required. Set the share options again, and you are done with the file sharing settings.
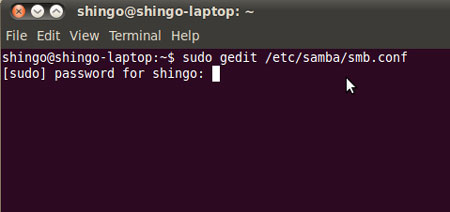
The next setting you will need to set is the configuration file so that it will join the network group that the Windows system is on to. Start the Terminal and key in this command.
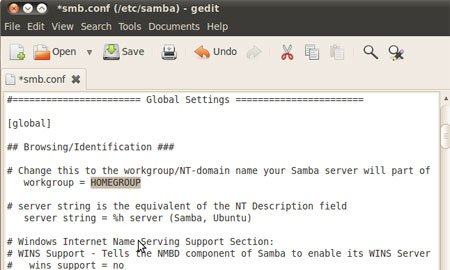
Key in your login password for Ubuntu and you will get to see a notepad full of configurations. Simply scroll a few lines down and look for the line to set the workgroup.
Change the name there to the domain of your Windows XP and save the document before you close it. Now a lot of people will be asking, how do I know what my Windows Workgroup name?
Check this article by Microsoft on how to set your Workgroup name
When the Windows operating system and Ubuntu are set to the same “Workgroup” name, they will be able to see each other on the network.
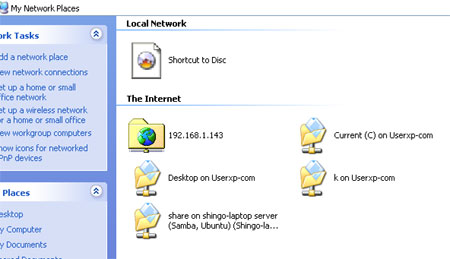
I hope this article on how to share files and folders on Ubuntu and Windows is easy to follow and understand.
Leave a Reply
You must be logged in to post a comment.