Install Mac OS Snow Leopard Onto Windows Computer
A lot of us may not want to buy a Mac computer because it is too expensive. There is a way to install Mac OS Snow Leopard onto a Windows Computer. The term Hackinosh has been out there for a very long time. However, if you want to do a standard Mac OS X installation with the original Mac installation disc without making use of any of the custom mods out there, this guide is for you. It makes use of the original Mac OS retail disc so that there is room for exact customization instead of sticking to the version that the hackers have for you.
Ever since Mac has evolved to the stage of supporting Nvidia graphics and Intel processor. The installation of Mac OS has become so much easier and hassle free. In this guide, I will show you the easiest way to install Mac OS Snow Leopard onto a Windows computer.
Warning: You are responsible for your own actions if you choose to follow this guide, I will not be liable for any damage or corruption of your existing Windows computer. I highly recommend that you remove any existing drives and use a fresh new hard disk before you install the Mac OS X so that your information will not be erased as a result.
Yes, the entire hard disk will be wiped if you choose to follow this guide.
First of all, you will need to meet a few requirements.
1) Have an Intel PC with a CPU chip that has a speed that is similar to any of the Mac computers. Actuallly, any speed should work, I have tried on a 3.0Ghz system and it works.
2) Have 2 sticks of 2 Gig rams. Best to set it in this configuration or it may not proceed or result in errors
3) Have a Nvidia graphics card
4) On board sound. Most commonly, Realtek audio
These specs look fairly simple and are not too hard for any common folk to own a computer with the following hardware demands. The rest of the stuff are not important. You can use any DVD drive, hard disk, keyboard and mouse.
Step 1
Prepare the hardware for installation.
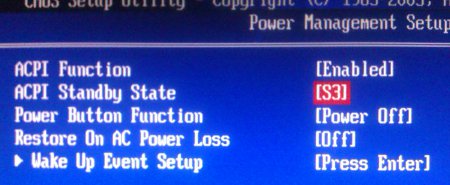
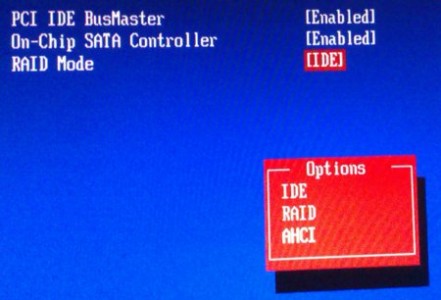
You will need to change some of the BIOS configuration your PC to facilitate the installation of the Mac OS X. Different motherboards will their settings placed differently. But in general, you only need to look out for the same “terms” or “options” .
Look for power settings and change it to S3
Look for AHCI and enable every single one of it.
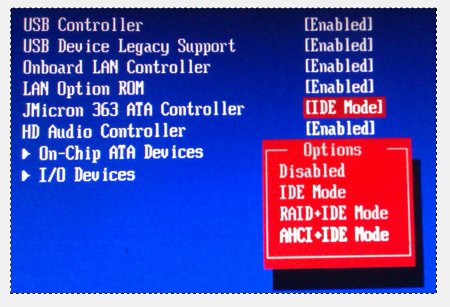
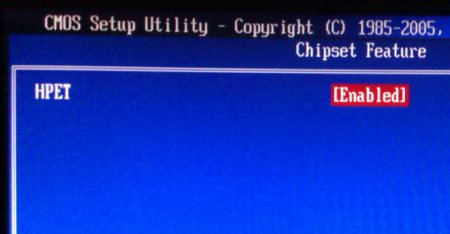
Look for HEPT and enable it.
Step 2
Installation procedure
Once you have the options changed. You can proceed with the installation. You will need to download the latest iBoot disc from tonymac forum. Burn it into a CD, use that to boot up your computer. Once the tonymac disc has been successfully booted, eject the tonymac disc and insert your Mac OS X DVD. Hit F5 and it will proceed to refresh the screen. Give it some time and it will eventually detect the Mac OS X DVD.
You can either hit enter directy to proceed with the installation or hit “-v -x” without the quotes before hitting enter. This will start the whole installaiton in safe mode. Use safe mode to install is recommended. For those who get stuck in a screen saying that it is still waiting for root device, you may need to make use oif the USB Mac OS X installer method, instead of using a the installation DVD. And yes, the DVD installation method failed for me as well.
Read up this article on how to create a functioning USB Mac OS X installer thumb drive.
If you intend to make use of a thumb drive to install the Mac OS X, the procedures are similar, insert the iboot disc, except that this time round you will plug in the USB drive first. Remember to choose boot from drive even though you intend to install with a thumb drive. Surprisingly, the thumb drive gets detected as an installation medium . And you will be able to proceed with the installtion from there.
From here , you can follow this same guide that teaches you on how to install the Snow Leopard onto a laptop. It is pretty much the same. The only slight problem that you may encounter will be that you are not able to change the display resoultion. This is because , you are using a DVI to VGA converter. This may not occur to you if you have a monitor that supports DVI
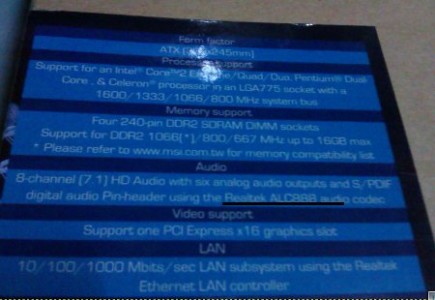
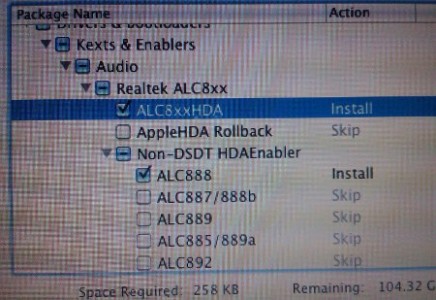
To install the kexts for Realtek audio, you will need to check your motherboard for the details. Take note of the final few digits that ditates that make and model of your Realtek chip.
Put ticks on the multi-beast in the following manner.
Reboot and now you should get sound for your Mac OS X. I hope this guide is easy for users to follow..
Leave a Reply
You must be logged in to post a comment.