Install Mac OS X Snow Leopard – Any Laptop
Mac OS X Snow Leopard On Any Laptop will require some configuration using Mac OS commands to achieve a successful install of the Mac OS X Snow Leopard. This can sometimes be too confusing for even the most avid computer geek to understand, so we will take this slowly, one step at a time!
In this tech guide, I will show you how to install Snow Leopard operating system onto a Compaq CQ 40 series laptop the easiest way possible. I will also include instructions on how to do multi-boot amongst Mac OS, Windows 7 and Ubuntu. Even though the procedure is quite lengthy, I will include lots of images and detailed instructions to make things easy for computer geeks who have not touched Mac before.
Theoretically, you can install into any laptop of any make and model, so long the hardware itself has the hardware configuration of any of the Macbook models on sale. There may be some settings and configuration that you may need to play around in the bios in case the installation gets stuck mid way.
First important step before you start the computer installation is to set the rams so that the system has only 2 sticks of 2 gig rams. Remember that you will need to emulate the whole rig so that it looks like a Macbook. You may need to buy or borrow from someone.
Step 1
First you will need to make sure you have the following items ready.
1. A copy of the retail version of Mac OS X Snow Leopard operating sytem. This installation DVD costs US $29. You can try downloading and burning it but I don’t know if the burned copy is going to work.
2. A copy of the Windows installation CD operating system [or the cloned image of your drive, read this article on how to clone your drive using Clonezilla ]
3. A copy of Ubuntu installation CD
4. The Mac OS X 10.6.4 Combo Update
5. Multi-beast
To begin off any installation of a fresh operating system, you will need to backup any data you wish to retain as usual. If you intent to retain the existing Windows installation that is from the laptop originally, you may opt to use clone software to clone the entire drive out onto a USB external storage. I suggest you backup files like mp3, movies and others that are not part of the Windows system seperately and delete the files from the drive so that the cloned image will not be so huge.
I need to inform you that for those who have a recovery partition in the laptop, you will lose that recovery partition. So please proceed to create the recovery discs first by using Windows or clone the partition out first before you carry on with installation of Snow Leopard. Unless for those who don’t really care if you are able to reset the laptop to its factory state, you can choose not to bother backing up the Recovery partition or making any Recovery discs.
Step 2
You will need to download and create the bootable “iboot” disc to start off the installation. Simply download the iso image and burn to a blank CDR. You will need to choose the correct version or else you will may not be able to be successful with the installation. Choose one from the 3 types that corresponds to the type of graphic card in the laptop. Some people may start asking, what about those with Intel HD or GMA HD cards?
** Update – Now iBoot uses a single version called the iBoot GE. It will but one unified version for any supported Intel CPU with either ATI or NVIDIA graphics. The new version is a permanent replacement for all previous versions of iBoot, including iBoot-NVIDIA, iBoot-ATI, iBoot-ATI-5xxx[2], and iBoot-Supported.
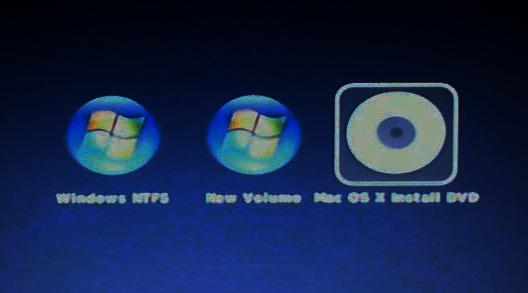
Now you can start the installation of your Mac OS X Snow Leopard operating system. First insert the iboot bootable disc into your CD drive and allow it to boot off. You will need to set the CD drive as the first bootable device in case you haven’t done so already. You will see the GUI interface of the iboot disc. Eject your drive and swap the Snow Leopard installation disc in. Press F5 and wait for the disc to be detect. You will notice that now the iboot icon has turned into the Mac OS X install DVD.
You can hit enter to start the installation. But for my Compq CQ 40, i will need to type this commands “-v -x”, before hitting enter. There is a space between the -v and the -x. The commands will appear right at the bottom left of the screen as you hit the keyboard. The “-v” means text mode and the “-x” is safe mode.
After the entire loading that takes quite a while, around 5 mins max, you should be able to see the first Mac installation screen. The first screen of the Mac installation is to choose the language of your choice, after which you will be presented with the screen to install Mac OS X.
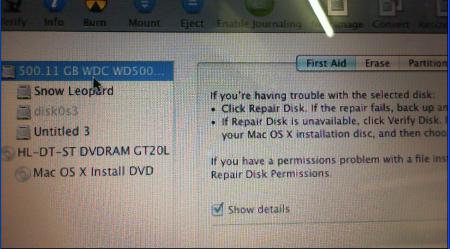
Do not click on “Continue” yet. We will need to first prepare your system before you proceed with the installation of the Mac OS. Click on the “Utilities” option right at the top of the screen. You will notice that there is this menu bar at the top. Select the “Disk Utility” option.
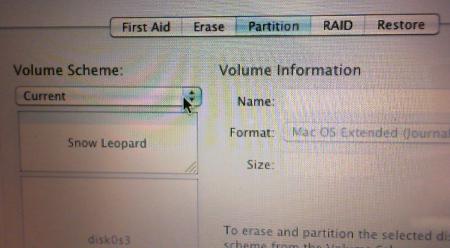
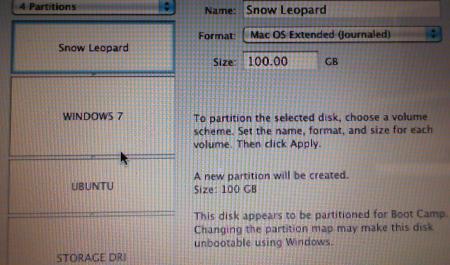
Click on the drive so that you can partition your computer before you can install Mac OS X onto this laptop. Note that it is click on the drive and not any partition. I had this situation where by I am totally lost when I could not find the partition tab and I am clicking on a partition and not the drive. Then click on the “Partition” tab at the right hand side to access the options to partiton your drive. Click on the dropdown menu called “Volume Scheme” to list the number of partitions you want to create and OS X will split the drive for you.
For example, 4 partitions and you can re-size them manually at the right hand side and name them as accordingly to what you intend to use for these drives. For the first partition, you will need to set the “Format” type as “Mac OS Extended (Journaled). But for the other drives, you can set as (MS DOS FAT), if you intend to install Windows OS there. You can also manually adjust and specify the space even after selecting how many partitions you want. So it depends on how big you want for your individual drives.
After you are done specifying the partitions, click on “options” and select GUID partition table and click on “Apply” at the lower right corner. The partitioning is very fast and takes less then a minute, so don’t sit and stare and think that the partitioning is going to take hours. Once you realize that the system is no longer making any sounds or any form of indication that it is working on something, you can close the Disk Utility by clicking on the red dot at the top left corner of the window. At this point in time, you might be wondering what happened to your Windows and restore partition? Yes, they are all gone. But if you want them, you must clone them out in step 1 during the preparation stage.
Now we are back to the main installation page. You can proceed by clicking on “Continue”. Click on “Agree” to the license agreement. Now you should see the only partition you have set as “Mac OS Extended (Journaled)”. Click on that drive followed by “Install”
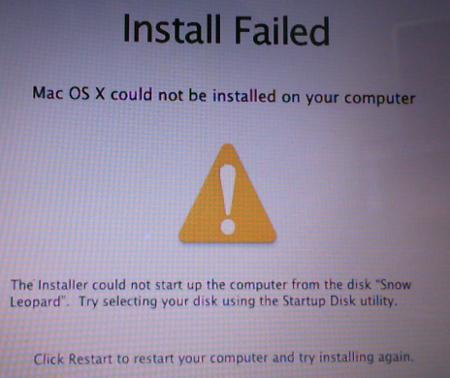
After the copying of files is done, you will see the image saying that your computer cannot be started up. Do a reboot and insert your iboot disk and you will be able to select the snow leopard partition and continue the setup from there. If you are not able to take out the disc, press the on/off button for 5 secs to turn off the laptop first then power on again.
This time round, you will see additional choices compared to the last boot up, using your arrow keys, go to the drive where Snow Leopard is installed and key in the “-v -x”
Now that you have entered the Snow Leopard operating system, you will need to set up the system first, follow the on screen instructions to identify your keyboard. The first key to press is the “z”, just press once and release. Do not hold it there. The next key to press is “/”. Now you can select the ANSI ( US keyboard), unless you really have something different.
The rest of the options are pretty easy to go through. For the transfering of information, just select “Do not transfer my information now”. For internet connection, you may choose “Local netwrok (Ethernet)”, if you connect via broadband that does not require any dialing. For those options to fill in, just leave it and go to the next page.
Fill in your name and set a password if you want. You can leave it blank since that is the equalvalient to the administrator password which will be forgotten in the long run. Click “Continue” and *uck the part about “Registration Information”.
Create your account and this part needs a password. Choose your account image, set the time and phew, all this nonsense is finally over. You can log in to your account and Yippy, your Mac OS X.
But the night mare is just about to start if you are using a Compaq laptop, it looks like HP and Dell do not have so much crap issues.
If you are like me, who ended up installing Mac OS in safe mode and trying to install in a crap Compaq, this is the part where everything gets difficult and you need to wade in the mud and get your hands dirty, else if you are lucky enough to have a laptop that cooperates with you and managed to install it in normal mode, you can simply install the updates and combo beast without any messing around.
Step 3
Making Mac OS X Snow Leopard bootable
All these steps only apply to those who are not able to start Snow Leopard in normal mode but ended up installing it and running in safe mode.
You can choose to burn the combo upgrade and the multi-beast to a blank DVD, or you can simply copy to a thumb drive and transfer it to the mac desktop and double click on it. For those unlucky ones who are unable to get the thumbdrive working since it is in safe mode, you can consider installing the boot loader first.
You can skip this the installation of the Chameleon bootloader step and proceed to step 3.1 directly for the installation of the ComboUpgrade and multi-beast if you can install the whole Mac OS X Snow Leopard in normal mode without any problems.
For the unlucky ones, you will first need to make your Mac OS bootable by itself. Or else, if we need to depend on the iboot disk all the time which is sickening, also safe mode limits a lot of hardware functions etc. You can use 2 methods to do so. Method 2 is the easy way out, but for some reason a lot of guides out there state that multi-beast should not be installed before the ComboUpgrade. Thus it is up to the individual to decide which path to take. If you install multi-beast first to make your Mac OS bootable, the ComboUpgrade will not go through. Even though the installation of ComboUpgrade is successful, your Mac OS is not the latest updated one.
Download theMac OS X 10.6.4 Combo Update first
If you are lucky, take out the iboot disc by clicking on the eject button right at the top right hand corner, insert the ComboUpgrade disc and try to see if you can install the ComboUpgrade. Note that the ComboUpgrade.dmg file has to be burnt as a dmg to disc and not a single file on its own. If you do that, the disc may not be readable even if you insert it into the laptop, this happened to me. You can however, transfer the whole image across using thumb drive if your laptop is a sweet little daring and the USB actually works. For me, no dice. :(
All these steps below that require you send files using Bluetooth and installing of a bootloader manually only apply to those who are not able to start Snow Leopard in normal mode but ended up installing it and running in safe mode.
Making Mac OS bootable
You can skip this step and proceed to the installation of the Combo upgrade directly if you can install the whole Mac OS X Snow Leopard in normal mode.
Method 1
For the unlucky ones, you will first need to make your Mac OS bootable by itself. Or else, if we need to depend on the iboot disk all the time, the drive is taken, and we cannot use it for anything else. Also safe mode limits a lot of hardware functions etc.
Lucky for me, I am able to send the file across using “Bluetooth”, amazingly, even in safe mode, bluetooth works. Download the Chameleon.zip file to any mobile phone with Bluetooth capability and use the phone to send it across to the laptop.
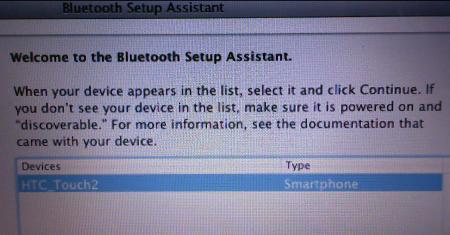
First turn on the Bluetooth on your phone and make sure that this phone is “Discoverable” to other devices. Now click on the “Bluetooth icon” at the top right hand corner of the screen and select “Set Up Bluetooth Device”
You will be able to choose the device, and Mac OS X will generate a code for you to key into your phone. You must key in the code from the mobile end and there should be a box that says “accept all incoming connections from this device”. You must put a tick on it or else your laptop will not connect to your phone.
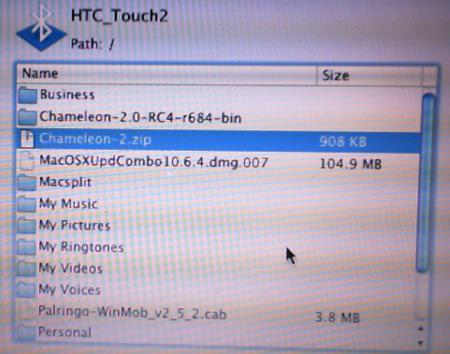
Once the pairing is successful, you can click on the “Quit” option and once again, click on the “Bluetooth” icon on the top menu. Now select “Browse Device”.
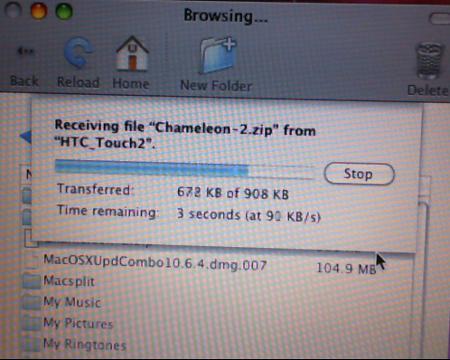
Select your mobile phone from the list and click on “Browse”. You must put the ” Chameleon-2.zip” file inside the “My Documents” folder of the phone and not anywhere else, you can only browse that part of the phone and not the SD card or anywhere. Select the file and click on “Get” and save it to the desktop.
Right click on the zip and select “Open”. The whole zip will be extracted automatically and be placed on the desktop as a new folder.
Click on “Applications” at the dock on the bottom of the screen and followed by “Utilities”. Click on Terminal.
Type “cd” followed by a space, then drag and drop the whole “Chameleon-2” folde r into the Terminal. Hit enter. You will be taken to the directory of that folder.
Type the following commands followed by enter
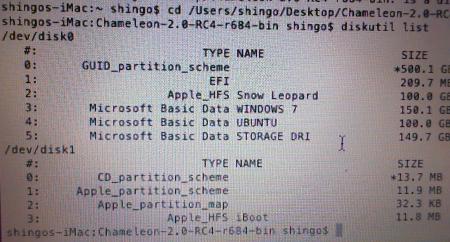
diskutil list
You will see some text
You will need to identify the number that is your Snow Leopard partition. For mine, it is number 2.
Type this commands followed by enter
cd i386
sudo fdisk -f boot0 -u -y /dev/rdisk0
[enter your password, it will not show or have any movement in your cursor, just hit enter]
sudo dd if=boot1h of=/dev/rdisk0s2
[replace the last number with the one that has your Snow Leopard OS]
sudo cp boot /
Now your Snow Leopard should be able to boot without using the iboot disk.
Now reboot the system physically and check if you can start without the iboot disk.
Try starting in normal mode now. Without the -v -x
If you can’t enter the Mac OS in normal mode, hit enter quickly when the boot loader is starting up, then key in those commands to start with the safe mode again.
Method 2
This is the easier way to get your Mac OS bootable, but it requires you to use multi-beast first. As mentioned before, if you installed the multi-beast before the ComboUpgrade, your Mac OS will not be upgraded at all even if the whole installation goes through with no problems. But of course the Snow Leopard still functions fine without the upgrade.
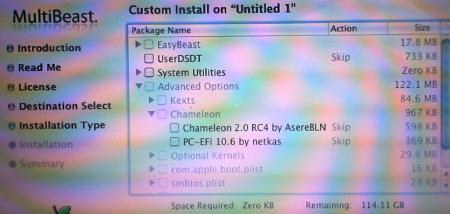
You will need to send the multi-beast across via thumb drive or Bluetooth, run the multi-beast and install the Chamelon boot loader from there. Advanced Options => Chameleon. Choose one of the choices there. Reboot and your system should be able to start without the need for the iboot disc.
Step 3.1
You will need to download the Mac OS X 10.6.4 Combo Update
Burn it to a blank DVD, you can use a DVD RW for this disc, it will work as well, since this combo upgrade is only 800 plus meg, so it is going to be a waste of a single DVD. You will need to make use of programs that can burn and read DMG files correctly. I used the UltraISO to burn it. Note that you are not to burn the DMG as a file on its own onto the disc. If you burned it correctly, the disc will be unreadable in Windows, but it is actually correct and you can read the disc in the Mac OS.
Another way is to burn it from the Mac OS laptop off from the current installation that you have as of now. But this is provided you can transfer the whole upgrade package across using a thumb drive. Some people may be able to copy it right across using a thumb drive and double click on the dmg file to mount it instantly without having to burn or do anything. But for me, I am not so fortunate. I end up burning the whole package to a DVD so that it shows up in the laptop.
You will also need to transfer the multi-beast across to the Mac OS laptop as well, either via thumb drive or using bluetooth. Since that multi-beast package is small, there is no need to burn it to a disc. Honesty, I cannot get the files to be read or opened after I burn them to a disc using Windows.
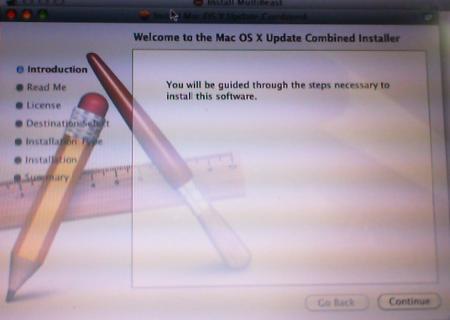
Once you have the multi-beast and the upgrade disc ready or mounted directly in Mac OS itself, double click on the upgrade package, but do not start the installation yet. Also start the multi-beast application and leave it opened. Once you are sure the multi-beast can be started, proceed to install the combo upgrade.
After the upgrade is installed, you will be prompted to restart the computer, but do not restart yet. Just leave the Window as it is and go to the multi-beast program and start the installation. The multi-beast will close itself due to an unexpected error. But keep on starting the program again and again until it moves on. It will close and close a lot of times.
But eventually, it will go through and you will come to the point where you are required to choose options from a tree chart. Choose “Easy Beast” and put a tick on the one that best describes your current hardware. For me, I choose “Install for supported CPU”.
You can reboot after the installation of multi-beast is done. Now you should be able to let the system run and boot up totally on its own without the need for any iboot disc and it should be able to enter the normal mode and it works fine.
I know that a lot of hardware like keyboard, Wi-Fi, sound, are not working. Stay tuned as I will be posting the complete guide on how to get the Kexts for Compaq CQ 40 installed soon. You can hook up USB mouse and Keyboard before you power up the system. Those devices will be detected and will function so that you are able to get your kexts installed. You can read this article here on how to enable all the hardware for the Mac OS X.
Step 4
Installing of Windows
Insert the Windows Installation DVD and reboot. You can follow these guides to finish off the installation. The XP guide, or the Windows 7 (check the video at the bottom). The only difference is that you must choose the correct partition to carry on from there. Since you have already named them when you are doing the partitioning in the Mac OS, you should not be making the wrong choice. For Windows 7 installation, you will need to click on the partition and format it NTFS before you can proceed with the installation.
If you have cloned out your existing partition, you can use Clonezilla to clone your image back to the partition you have set aside for the cloned image. Remember to select the correct partition and also make sure that the partition reserved for the clone is larger then your cloned image.
If you have installed Windows 7 from scratch, Mac OS will not load and you will only get Windows 7. If you use the iboot disk, use that to boot up, you should get the options to choose and enter Snow Leopard or Windows 7. But of course we won’t be doing this because this is silly. At this point, if you do not intent to install Ubuntu, you can use the iboot disk to enter Snow Leopard and use Step 3 again to install the bootloader back. Tahda.. your adventure is complete.
If you have cloned your drive back, you should still be able to see the Mac OSX boot loader. Hit enter and you should now get to see your Windows drive in one of the options. Try entering your Windows partition to see if your Windows is still functioning correctly. It will go into some chkdsk several times and eventually, it should start up and enter Windows. Honesty, I haven’t tried this yet. :P I will do it and see if it turns out based on theory. If you intent to boot Windows and Mac only, this should work and your journey ends here.
If you encounter some strange issues and Windows refused to start up, hopefully you have your Windows installation disc, download super grub disk and use that to repair the boot loader for Windows. Then you should be able to enter Windows and Mac is missing. Simillarly, use the iboot disk to enter Mac and install the Mac boot loader in step 3.
Step 5
Installing Ubuntu
For those who are only interested in having Ubuntu and Mac only, you can follow this guide on how to dual boot Ubuntu with Windows. It is generally the same thing with the slider and partitioning. The only thing you will need to take note of is that there is a scroll bar at the bottom of the partitioning chart that allows you to drag to the right. You will be able to reveal the slider bar so that you can drag and resize the Ubuntu partition to the size you want. Go through the same installation process as described in that guide and after rebooting, you get your Ubuntu and Mac OS X dual boot.
For those who have installed Windows and want to do a triple boot, you cannot use that guide to do the installation. If you do so, Windows will not be able to load due the some bootloader issues. You will need to set the partitions of Ubuntu manually. Follow this guide on how to do it manually. I hope this tech guide on how to install Snow Leopard into a Compaq CQ 40 laptop is easy for all to follow.
11 Comments Already
Leave a Reply
You must be logged in to post a comment.


Thanks Buddy! I truly enjoy the information that? you’re sharing bruh! Extremely simple to comprehend.
whoah this blog is excellent i love reading your posts. Keep up the great work! You know, many people are hunting around for this info, you can help them greatly.
This is an excellent step by step guide that I have came across to install MAC OS X SNOW LEOPARD on any laptop. Much appreciated. Keep it up. Thanks a lot.
I wish Shingo could make a list
of compatible hardware broken down by
chipset and controllers. I think
this would be necessary if a user wants
to be sure that the graphics, ethernet, wifi, bluetooth, sata, and usb chipsets
(to name just a few), are fully supported by
the OS X drivers.
I doubt that OS X supports all the chipsets that are used in PC’s.
Even Microsoft cannot boast having drivers
for every chipset and controller. That is
why a PC manufacturer will provide a drivers CD.
The developers of multi-beast are constantly creating drivers for new chipsets and hardware. Generally, we can safely say that all major hardware like Intel, AMD, Nvdia and ATI chips are supported.
But there are chances that some models may not work at all or will not be perfect. So the best bet is to get some of the popular models that are known to work out of the box. Like Dell and HP.
Any one tried to install on ThinkPad?I have a ThinkPad T60 with C2D T2500 and ATI X1400 Graphics
Will Wifi/Bluetooth work without problem?
hey dude… i am also having a compaq CQ40 laptop… n m tryn to install mac onto it.. but i m not able to get it.. can u please help me in doing so.. i get an error “still waiting for root device” n when i do it from iboot it shows “u need to reatart ur computer” n then nothing happens.. i think theres something wrong with my bios settings.. can u please help me.. i realy want mac. please help :)
I think I replied on the Youtube video already. Are you the same person?
Great Guide, I assume it is a simular method for Lion? I currently use snow in a vm and would like to install lion on a dedicated machine.
I have hp with 2x1gb of ram,can i install lower versions of mac os x the same way that you describe!?
HP should have no issues. They are one of the most compatible models.