PC Upgrades Part 2
 Welcome to DIY PC Upgrades part 2, in part one I have already covered areas on how to sort out the casing and seat your motherboard into the chassis. In PC Upgrades part 2, it will consist of hooking up the rest of the peripherals, cards and connecting of the cables to complete the whole rig. When it comes to messing with the internal hardware of a computer system, it is very important to note that no power is being supplied to the rig and you must press the “on button” on the casing once to discharge all electricity to prevent accidental damage to the parts due to static.
It is very common for users to experience issues such as constant reboot, beep codes and even no power at all. I will list some of the more common symptoms and directions that will help even a computer geek when it comes to sorting out computer problems.
Graphics Card
When it comes to talking about graphics card, I wish to inform everyone, noobs to computer geeks that some motherboards come with a onboard video chip. Therefore, if you are not a gamer, there is no need for you to purchase a graphic card at all. In order to tell if you have a video card on your motherboard, all you need to do is to try and hook your monitor’s cable onto one of the ports that is from the motherboard. Look for a VGA port. Avoid being confused with “Com Ports” that look very similar to a VGA port. One easy way to identify will be that video port will not have pins.
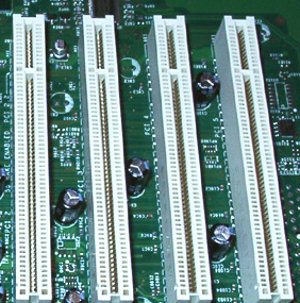
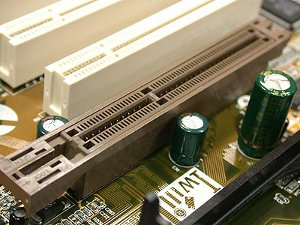
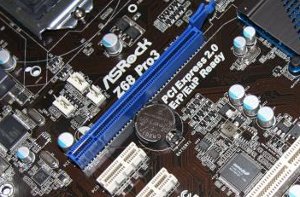
Some users who are not sure what kind of video card there are in the market out there and how to judge and determine what they should buy for their own system. One easy way to identify what card will fit into your slot is by the colors.
White : PCI video card ( totally outdated and not for gaming )
Brown : AGP video card ( Outdated and not commonly used anymore )
Blue : PCI-E ( The current standard as of recent the year 2009 )
You can speak to a hardware shop about which graphic card to get, based on the color of the graphic slot in your motherboard. Inserting the graphic card into the graphic card slot is fairly simple enough. All you need to do is do a very simple estimate on how the graphic card will be seated before removing the screw on the casing that is used to fasten the graphic card.
Insert the card by putting all your focus on the golden contacts of the card instead of anywhere else. What is important is that the golden contacts are correctly inserted into the PCI-E slot, not the screw. Screw in the screw after you are done seating the video card.
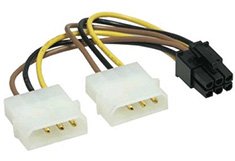
Advance graphic cards will require power inputs. Check the card physically for any 6 pin connectors. Some powerful graphic cards even need two 6 pin power connectors. For cards that require two 6 pin power cables, you will need to check the graphic card box for a special converter that will convert a 4 pin cable to a 6 pin connector. Since this connector looks totally different from other connectors, it is impossible for anyone to hook up the wrong cable to the video card.
Hard disk and drives.
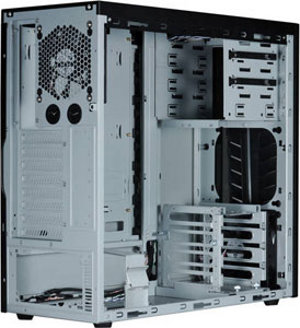
The personal computer tower is divided into 3 primary sections. The top section if for disc drives. The mid section is for smaller drives such as floppy disks or Zip disks, but these are already phased out. The lower section is for internal hard drives. Secure the drives by sliding them into the CPU tower slots that are meant for them and screwing them to the holes that are at the side of the hardware. Slide your drives slightly forward and backward to get a good position to fasten the screws
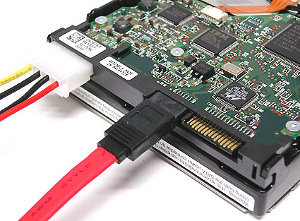
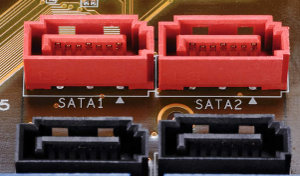
Now to connect the cables, for the drives you will need to connect 2 cables only. Do not make any guesses in hooking up the connections. This is very dangerous. Primarily, you will need to hook up one data cable and one power cable. Some older drives have a pin configuration setup to adhere to. But I will cover newer drives that have only the Sata and power connections. For newer Sata drives be it disc drives or internal drives, it is easy and straight forward. Just hook up a Sata cable and a power cable. No specific pattern required.
One advice I will give is that if you have a lot of Sata slots, use the Sata slots at the beginning, because some motherboards will not detect the drive if you hook them on slots that are at the rear because those slots at the end are meant to serve as “Raid” setups. You must physically see the marking on the slot to tell if it is a slot at the front or at the end. It is numbered 1 to 8 for example, with “1” as the first slot.
Power Supply
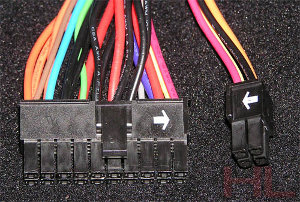
The power supply is usually the scariest portion of the whole connecting process. The only easy part is screwing it at the top portion of your tower. When it comes to connecting the chunk of messy cables all over the motherboard, it is an overwhelming task for even experienced computer geeks. Let’s start with the long rectangular plastic cable. This is rather easy to identify even for a noob. Use the catch “lever” on the cable as the guide on which direction to hook the power cable to the mother board. Ignore the tech terms like 12 V rail. Just hook it in. Most boards have an additional separate 4 pin from the main rectangular connector. But don’t get confused and mixed up with the other four pin connectors. There are at least 2 of such 4 pin connectors. The one that is meant to go with the longer rectangular rail has a special cutting and groove at the side of the plastic. Do take note of that.
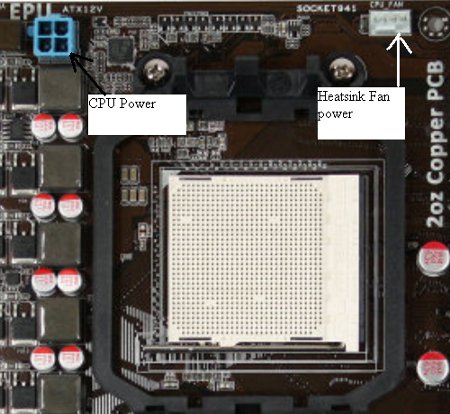
There is the other 4 pin socket that I spoke of, connect the 4 pin plug to the 4 pin socket to provide power to the CPU. Similarly, use the lever as the way to judge which direction is correct.
Hooking up of power to individual hardware will be explained in their own sections.
Pin configuration
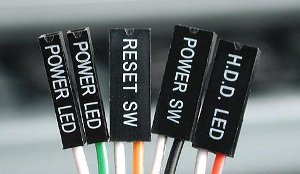
Now this part is also the most difficult part when it comes to assembling up a system. You will be able to find a chunk of mini connectors usually stashed and tied together in a clump some where at the lower part of the tower. One way is to search somewhere near the power and reset buttons, and you will eventually lead to a whole stack of wires.
You do not need to hook up every single of them, just the essential ones. This is not the time to be lazy and hope that it is that easy. You will need your mother board manual. Turn to a page that contains information about “Pin Configuration”.
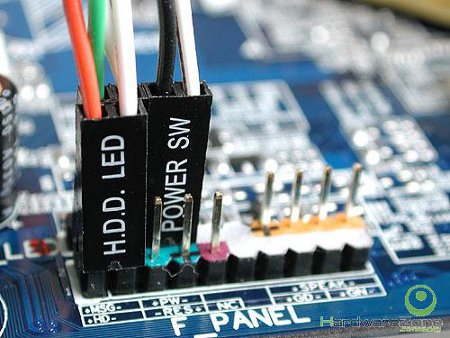
Every motherboard has a set of pins usually somewhere at the side of the board. The number of pins will be drawn magnified in the form of a table stating what those pins are for. You can fix the pins in any direction, as long as the proper pins are being connected.
But some small issues such as a 3 pin connector against a 2 pin setup on the board. You will need to make do without the use of some cables, or make use of a sharp object at the side of the connector that will allow you to remove the golden copper piece of the connector and slot it into the appropriate holes in the plastic case. There is a low possibility that you can hook up all the cables perfectly. Some may have to be omitted. But the basic connectors that have to be hooked up will be at least the PW and the RST pins. So that at least you can turn on the system and do a reset. If you are lucky, you will have a motherboard that has markings on the pins so that you do not need to refer to the manual all the time.
CPU
The CPU requires power as well; I have already mentioned in the power supply section, you will need to hook up a 4 pin power to the motherboard to provide power to your CPU. Do no forget that there is a small 3 pin power socket on the heat sink that allows you to provide power to the fan that cools the heat sink separately. The wire of the fan from the heat sink is usually circled around the fan so you have to release the wire to make it long enough to reach the connector. Do not release too much in excess, because this will result in a huge risk of having the extra lengths of cable getting entangled with the fan.
Finalizing the setup
There are additional connections that need to be done such as fans that are on the tower, but before you finish with all the connections, there is one term called a “bird’s nest” that we need to avoid. Do not connect the cables directly all over the place stretching from one corner to another.
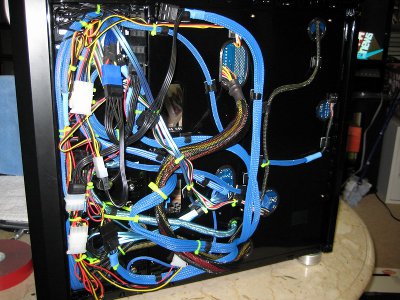
It is a good practice to curl and twist the cables in a neat bundle and have it tied with cable ties along the edge or frame of the casing. This will prevent heat build up and also make it easier to put additional hardware without getting entangled with the mess inside. But you can do the twisting and bundling up of the cables only when you have done the first start up to check that there is no problem with the connection and the system runs without any issues.
Common problems
This section will list some of the common issues that pertain to most computer geeks when it comes to making a new build.
1) No Power
Check the pin configuration to see if the pin connection for the Power button is connected correctly, swap around if necessary or check if it is a case of 2 pin setup against a 3 pin connector. Check if you missed any of the power connectors, or the PSU is not turned on yet.
2) Constant Beeping
This is commonly related to rams that are not seated properly. Try with one stick of ram.
3) Powers off after attempting to boot up
Highly related to a short circuit issue where by the power cables are connected in the wrong manner. This is tricky, I suggest unpluging power to all fans except the one for the heatsink of the CPU. If it does not work, unplug additional power connectors that are connected to the hard disks or drives. Also check to ensure that connections in between extensions are also removed and try to boot up until you can at least have the system on without shutting down. After which, I suggest turning on once after making a single connection so that you can identify which connection is causing the problem.
4) No display
Check the DVI or VGA connector to ensure it is secure. On both ends, the end on the monitor and the one attached to the tower. There is no need to screw it on, just press the connector in with decent and gradual pressure. Did you hook up the power to your graphic card?
Problems that plague a new DIY build can be an endless list due to cables that are not secured properly or even problems that exist with no reason except to make fun of you. For new computer geeks who are stepping into the world of computer building, I suggest you read up lots of information and guides before doing any step. You may use one month to complete the build, but once you are done, you cannot describe the satisfaction with words. I hope all users enjoy this guide on how to do a PC Upgrade part 2.
1 Comment Already
Leave a Reply
You must be logged in to post a comment.

Very well written. I think you covered everything.