Reset Bios
Reset Computer Bios
 BIOS (Basic Input Output System), Is the first piece of software loaded when you boot your computer. It has all the information necessary to control the monitor, hard drive, keyboard, etc…
The Computer BIOS code is stored on a CMOS (complementary metal oxide semiconductor) chip on your motherboard, but because RAM is faster than ROM, the BIOS is copied from the CMOS to the RAM when the computer is booted. This is called shadowing.
There are different BIOS from different companies. The most used BIOS are Phoenix and Amibios.
How to Reset?
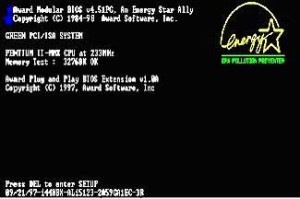
Boot your computer and as soon as you hear a beep or see the “Press DEL to enter setup” start pressing the “DEL” button on your keyboard a few times.
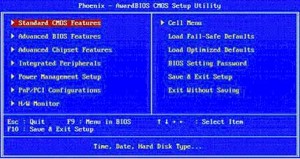
As soon as you press the “DEL” button, The BIOS Setup Utility launches.
The above picture is of the Phoenix BIOS Setup Utility. Notice on the right hand side that there are a few options to load the default settings. In the above situation you should go with the optimized default and then in case it doesn’t work you should fall back on the fail safe default.
If your BIOS has been damaged or corrupted, and it prevents you from accessing the setup utility tool, then you will need to do a manual reset or clear CMOS by opening the computer case.
Clear CMOS with Jumper.
Quite often you will find that during any alterations to the graphics card / AGP card, the RAM, or indeed if you have been playing around in the BIOS trying different over clocking procedures you can end up with errors that will prevent your PC from booting ! But don’t panic, there is a facility on your motherboard called “Clear CMOS” which allows you to reset the BIOS to the default configuration.
Get your motherboard’s user manual and look for the motherboard layout diagram. Look for the CMOS jumpers.
Note: Nearly all modern motherboards require that you remove the battery from the board in order to clear the CMOS. Therefore irrespective of the age of the motherboard, it is a good idea to do so. At least then you are sure that the CMOS has been cleared, rather than put everything back together only to discover that you should have removed the battery in the first place.
Make sure that your computer is unplugged from any mains supply before opening the case.
There are three pins, and the jumper connects only two of them at any time. You will need to move the jumper to the next pin as showed in the picture below. If as has happened to me on several occasions, there is no jumper to use, then holding the tip of a small screwdriver across pins 1 & 2 will achieve the same results.
Leave it in this position for about 30 seconds to erase all your settings and drain any residual charge from the board’s capacitors. This will then cause the board to fall back to the default settings which are hard coded into the chip.
Just return the jumper back to where it was and you are done.
Update / Flash the BIOS.
This really is a last resort to changing your motherboard & it should be understood that if you get this wrong, there is no going back, your board is ready for the trash can. If your BIOS is corrupted for whatever reason, or in fact if it is fairly old & outdated you can attempt to flash the bios & re-install it. This is a much cheaper option than replacing the motherboard & was often done in order to get an older motherboard to accept large hard drives or indeed more memory than it was originally designed for.
Go to your computer manufacturer’s site and look for the BIOS update, You should find either a floppy or a CD version. There are different methods employed depending on the manufacturer, so read the manufactures instructions carefully before proceeding.
Basically, you have to download the new Bios & save to either floppy or CD. You then have to reboot the system to the relevant drive ie. Floppy or CD Rom and this should, if done correctly, update / Flash your BIOS.
4 Comments Already
Leave a Reply
You must be logged in to post a comment.


what about software???
Indeed, what about software….???
If your asking is there any software needed to reset your bios, then the answer is NO!
If your asking about the effect on already installed software, then resetting your bios using the “clear CMOS” switch as illustrated, will not have any effect on your currently loaded software.
If however your asking about flashing your bios, then the answer is YES & that is the new bios that you would download from your motherboard manufacturer.
Please do not get resetting & flashing your bios mixed up, they are two totally different things and whilst resetting is a normal everyday practice for a computer tech, flashing the bios certainly is not!
hi, i used the optimized default setting, and it slowed my computer’s startup time very much. Why did that happen? and what can i do to reset it back ?
The optimized defaults will reset all settings back to the state where it will check almost every area of your system.
Even though optimized should mean faster, it only means better settings in terms of ram timings, temperature and others so that the OS itself can run better in terms of stablibility.
You can check the “Boot Priority” options usually in the second menu and disable most of the other boot devices. You can just set the boot priority to just one HDD 0, and that should do just fine. Also disable the “Boot from other places”. This will stop the system from checking all over the place for other boot area instead of your hard disk. This will speed things up.