Share Files between Mac OS X & Win XP
 Welcome to DIY Computer Repairs Tech Tips and Guides. In this article, I will show you how to easily share files between Mac OS X and Windows XP. First off, you will need to connect your Windows computer and Mac OS X computer to a common internet network first, which is of course the home Wi-Fi network. Mac OS X is able to detect any shared folder in Windows automatically but it is a little tricky on the Windows side. This technique works even if you are using those portable hotspot devices as a temporary router. Let’s start by working out one operating system at a time.
Allow sharing of files for Windows XP
In order allow other computers to see your system; you will need to set the properties of that drive or folder to be “shared”. Otherwise no matter how much effort you try on the other computer, you can never see the files on your XP computer. It is recommended that you set one specific folder to be shared only for security sake and also to avoid accidental delete or corruption of your files. Every folder in Windows XP can be shared, even the Windows operating system folder itself.
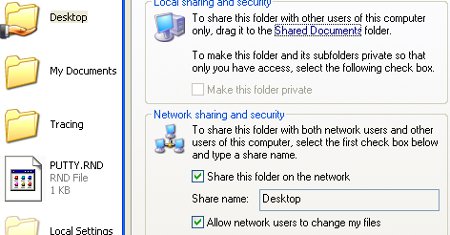
For example, I want to share my user desktop. Open a window and navigate to C:\Documents and Settings\user.
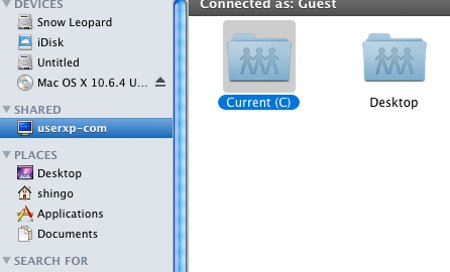
You will see the “Desktop” folder. Right click on it and select properties. Click on the “Sharing” tab. Put a tick on the “Share this folder on the network”. Now you should be able to see that folder in your Mac OS X. If you want, you can also check the “Allow network users to change my files”. This way, you can delete or overwrite the files from the Mac OS X side.
Allow sharing of files for Mac OS X
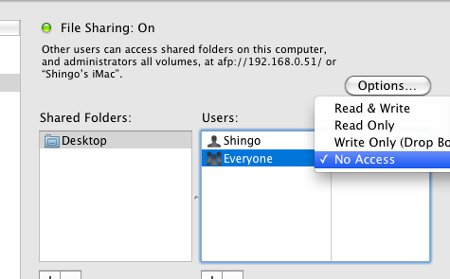
In order to allow other computers to view Mac OS X folders, you will also need to set the sharing permissions on the Mac OS X side. But it takes a little more effort to do so. Click on the “System Preferences” on the Mac dock and select “Sharing” under the Internet & Wireless category. You will see a whole list of stuff that you can share in your Mac OS. In this case, you will choose “File Sharing” which is the 3rd option. You will be able to select which folders you wish to share in that place.
You must also set the permissions if you want to allow read only or read and write. You will also need to click on “options” and ensure that the “Share files and folders using AFP” and Share files using SMB (Windows)”
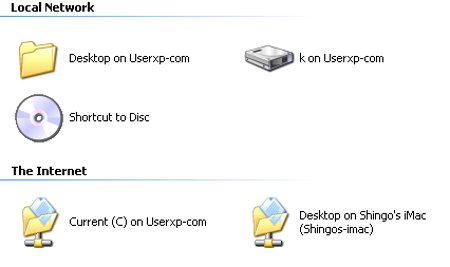
Once you have applied all settings in the Mac configuration and setup, you should be able to see the Mac OS X by clicking on the start menu => My Network Places
I hope this guide on how to Share Files between Mac OS X and Windows XP is easy for everyone to follow. That is all about it for now for this article. Keep browsing and keep learning, stay tuned for more guides at DIY Computer Repairs.
1 Comment Already
Leave a Reply
You must be logged in to post a comment.
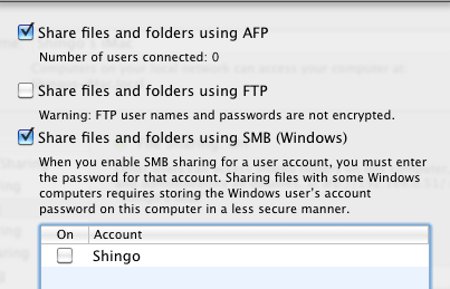
One important step is to “Select the user account checkbox to On state” after selecting Share files and folders with SMB before clicking Done.