Virtualbox Mac OS X Snow Leopard Using Windows
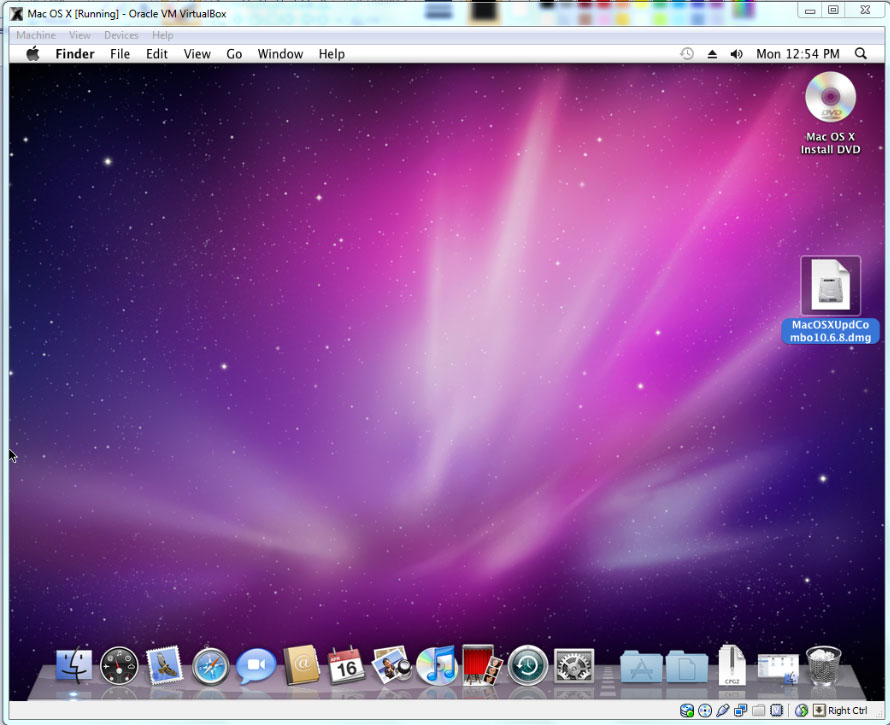
To run Virtualbox Mac OS X Snow Leopard Using Windows is not too difficult, this article will show you how to Install Mac OS X Snow Leopard inside Virtualbox using Windows. My guide will be specifically focused on the settings in Virtualbox. The installation phase is straight forward. It is how you setup the environment in Virtualbox that will determine if you will succeed in putting the Mac OS X Snow Leopard in the Virtualbox software My guide will allow you to use the Mac OS X disc directly. Even though I tested it out using an iso file because it is faster, I believe it will work as well using a disc.
Click for larger image
Step 1 – Preparation
1. Get a copy of the Mac OS X Snow Leopard installation CD.
2. Get a copy of the iboot software from tonymac forums.
3. Install Virtualbox software.
4. Optional. Install the Virtualbox Extension Pack. But good to do so. Simply download the file and double click on it. If you have already installed Virtualbox, the downloaded file will automatically associate with Virtualbox and install onto the program for you.
Restart your computer and the settings can be updated to your system.
Step 2 – Setting up of the Virtualbox Settings.
Run the Virtualbox software. Click on “New” icon. Ttype in any name In the first entry. Select Mac OS X for the “Operating System” and “Mac OS X Server” for the Version.
Adjust the rams to a much higher value. Do not tax your system too much or you will suffer from lag.
Select create a new disk for the next prompt and select VDI as the type of file. Fixed sized drives are my personal preference as I feel that they are more stable then dynamically expanding.
Mac OS X requires at least 12 Gigs of basic installation space. You will need to create a large disk, You will decide how big you want the virtual hard disk to be. After creating the drive, it will show up on the left side as one of the virtual machines. Lets proceed to edit the settings. Click to highlight your virtual machine and click on the “settings” icon at the top. You are required to make changes to the following settings in Virtualbox..
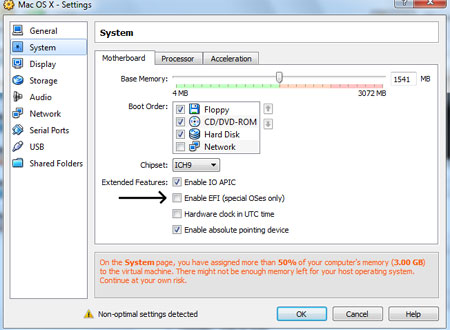
1. Under the “System” => Exended features, uncheck the “Enable EFI”
2. Under the “Display” => Video Memory, increase it to the max and enable 3D (optional )
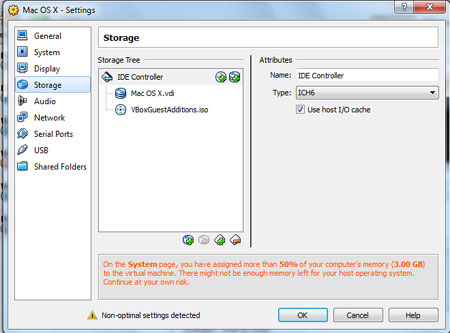
3. Under the “Storage” => remove the current arrangement and re-attach as IDE and not Sata. Also change the IDE Controller to be ICH6
4. Audio should be set as Intel HD Audio
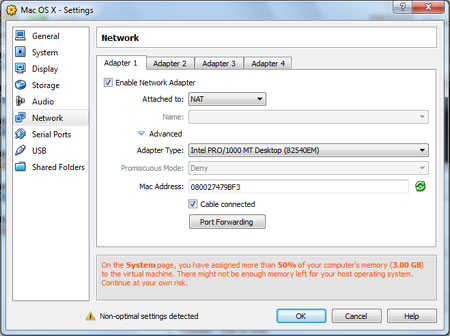
5. Network => Set as Nat but click on the “Advanced” tab and change it to Intel Pro/1000MT
Step 3 – Installing Mac OS X Snow Leopard onto Virtualbox
Start the virtual machine by clicking on the green arrow. Once it has started, click on “Devices” => CD/DVD => Choose a virtual CD/DVD file.
Browse and navigate to the iboot.iso file that you have downloaded and choose that file. After that, click on the “Machine” ,option followed by “Restart”. The iboot bootable disc interface should come up. If it does not show up, hit F12 when the virtual machine has just started running and hit c to choose to boot off from CD drive.
Virtualbox will now freeze at this iboot screen. Click on the Devices” => CD/DVD => Choose a virtual CD/DVD file. Choose your Mac OS X Snow Leopard.iso file or just point to the drive that has the physical Mac OS X DVD. Click on the virtual machine window and Hit F5.
The CD icon should now change to a Mac OS X DVD instead of iboot. Hit enter and it will proceed to install. You will get to the Mac OS installation interface screen. After choosing your language, click on the top of the screen that has the menu and choose “Utilities” => “Disk Utility”. You will need to partition your drive.
You can follow the guide on how to install Snow Leopard, the partitioning of the drive is very similar. When you are done installing Mac OS X for the first time, you are required to release the Mac OS X DVD and re mount the iboot iso. Mac OS X will not be detected by default. You will need to use the iboot disc to load the Mac OS X.
Once you have entered Mac OS X in Virtualbox, you can follow the same guide on how to install Mac OS X into a normal computer. Install the multi-beast by selecting the easybeast option and the bootloader. After installing these 2 options, you do not need the iboot cd anymore.
Since the Shared folders” in Virtualbox do not work for Mac at all, you will need to make use of work around in order to transfer files between the Virtual Mac. You will need to to make use of the network file sharing to connect to the Windows via IP.
From your host Windows operating system, Press the “Windows Key” and start typing away. Type “cmd” without the quotes, hit enter to open the command prompt. Type “ipconfig” without the quotes and hit enter. There will be a list of IP addresses. Identify the IP that belongs to your computer.
Using the Mac OS X in Virtualbox, you will need to connect to the Windows Desktop by means of networking. Go to the “Settings” options, under “Sharing”, put a check on enable file sharing.
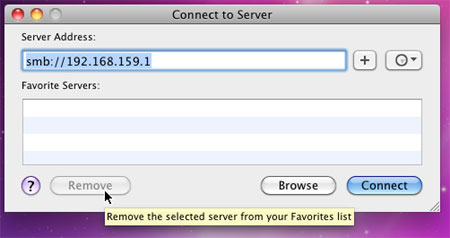
Click on the Finder, or Desktop and click on the “Go” option in the menu followed by “Connect to Server”. type in your IP into the box in this manner
There may be a prompt asking you to choose account you wish to use and enter the password etc. If you do not see any of this, you will need to enable sharing in the Windows operating system. This is the folder that you have set to share in your Windows computer. If you did not enable sharing at all in your Windows computer, you won’t be able to connect your Virtualbox Mac OS to your Windows.

Leave a Reply
You must be logged in to post a comment.